
 English
  日本語
日本語  Deutsch
  Español


How to pack sliced apples for lunch?
Contenido
- 1 Why Sliced Apples Turn Brown — and How to Stop It
- 2 Slicing Techniques That Make a Difference in the Lunch Box
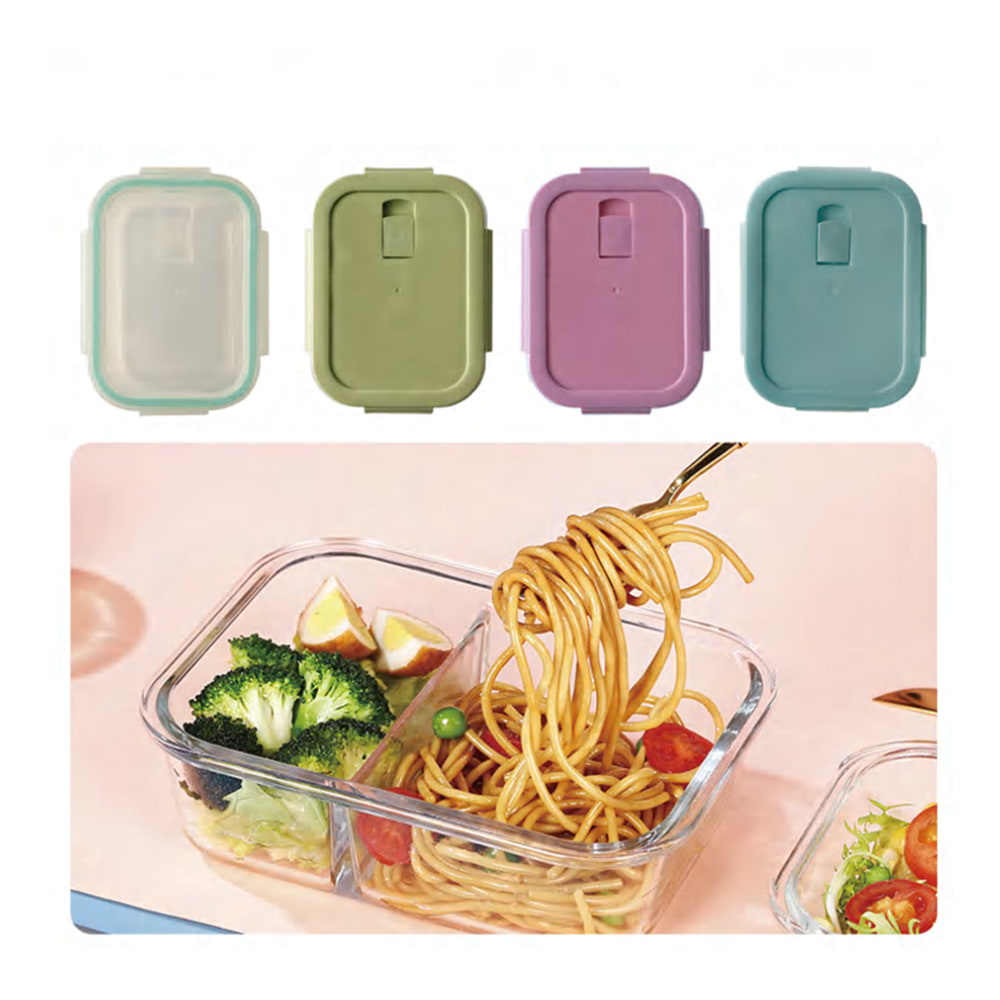
- 3 Choosing the Right Container and Lunch Box Setup
- 4 Which Apple Varieties Hold Up Best After Slicing
- 5 Prepping Sliced Apples the Night Before: A Step-by-Step Guide
- 6 Pairing Dips and Accompaniments in the Lunch Box
- 7 Packing Apple Slices for Kids: Specific Tips for School Lunch Boxes
- 8 Packing Apple Slices for Work: Adult Lunch Box Strategies
- 9 Common Packing Mistakes That Ruin Apple Slices by Lunchtime
- 10 Nutritional Benefits of Including Apple Slices in a Lunch Box
- 11 Frequently Asked Questions About Packing Sliced Apples for Lunch
- 11.1 How long do sliced apples last in a lunch box?
- 11.2 Is it safe to pack apple slices in a lunch box overnight?
- 11.3 What is the best anti-browning method for a kid's lunch box?
- 11.4 Can you pack apple slices with other fruits in the lunch box?
- 11.5 Does peeling the apple affect how long it stays fresh in a lunch box?
- 11.6 What container is best for apple slices in a lunch box?
- 11.7 How much lemon juice should I use for apple slices?
- 11.8 Can I use apple cider vinegar instead of lemon juice?
- 11.9 Are Cosmic Crisp apples really worth the extra cost for lunch box packing?
- 11.10 How do I stop apple slices from getting soggy in the lunch box?
Why Sliced Apples Turn Brown — and How to Stop It
Before picking a method, it helps to understand what you are actually fighting. Apple flesh contains an enzyme called polyphenol oxidase (PPO). The moment a knife breaks through the skin, the enzyme contacts oxygen in the air and triggers a chemical reaction called enzymatic browning. The brown color is a group of pigments called melanins — harmless to eat, but unappealing in a lunch box.
Temperature matters too. At room temperature, PPO is highly active and browning can begin within 10–15 minutes of slicing. Cold temperatures slow the enzyme significantly, which is why refrigeration is always part of a good packing strategy.
There are four practical ways to disrupt the browning process, and you can combine more than one for the best result:
Acid Treatment
Acid lowers the pH of the cut surface below the range where PPO is active (roughly below 4.0). Lemon juice is the most common choice. A study published in the Journal of Food Science found that a 1% citric acid solution reduced browning by over 80% compared to untreated apple slices. You do not need much: toss the slices with a teaspoon of lemon juice per apple, or dilute lemon juice 50/50 with water for a milder flavor.
Other acid options include pineapple juice (naturally high in citric acid), orange juice, or a dilute apple cider vinegar rinse. Of these, lemon juice gives the most neutral flavor impact and the strongest protection.
Salt Water Soak
Dissolving one-quarter teaspoon of salt in two cups of cold water and soaking apple slices for three to five minutes is one of the most effective anti-browning tricks available. The sodium ions interfere with PPO activity directly. In informal testing by food science educators at America's Test Kitchen, a light salt water soak outperformed both plain water and honey water in keeping slices fresh for up to eight hours. Rinse briefly under cold water after soaking if you prefer minimal salt taste.
Reassemble the Apple
One surprisingly effective low-tech approach: core the apple, slice it into wedges, then press the wedges back together into their original apple shape and secure with a rubber band. Without a treatment, the slices pressed together have much less surface area exposed to air, and browning is noticeably slower. This method is popular for kids' lunch boxes because it requires no liquid and the apple looks whole until the rubber band is removed.
Honey Water Dip
Mix one tablespoon of honey with one cup of water and soak slices for 30 seconds. Honey contains glucose oxidase, an enzyme that consumes oxygen locally, plus it creates a light coating that limits air contact. Research from Brigham Young University found that a honey solution delayed browning for up to eight hours — comparable to commercial anti-browning products. The slices pick up a subtle sweetness that most people enjoy.
| Method | Effectiveness (hrs) | Flavor Impact | Best For |
|---|---|---|---|
| Lemon juice toss | 4–6 hrs | Slight tartness | Adults, snack platters |
| Salt water soak | 6–8 hrs | Minimal if rinsed | All ages, overnight prep |
| Honey water dip | 6–8 hrs | Mild sweetness | Kids' lunch boxes |
| Reassemble method | 3–4 hrs | None | Quick packing, young kids |
| Pineapple juice soak | 4–5 hrs | Tropical sweetness | Kids who enjoy fruit combos |
Slicing Techniques That Make a Difference in the Lunch Box
How you cut the apple influences how long it stays fresh almost as much as the treatment you use. Thicker slices have less total exposed surface area per gram of apple, which means slower browning and less moisture loss. Aim for slices around 8–10mm thick rather than paper-thin cuts.
01
Use a Sharp Knife or Apple Slicer
A dull knife crushes cell walls instead of cutting cleanly. Crushed cells release more PPO and juice, accelerating browning. A sharp chef's knife or a dedicated apple slicer-corer tool (the kind that stamps through the whole apple in one push) gives the cleanest cut. If you use an apple slicer, the resulting wedges are uniform in thickness, which helps them fit neatly inside a lunch box without rolling around.
02
Remove the Core Completely
The seed cavity and the fibrous core tissue brown faster than the surrounding flesh. Removing them gives the slices a cleaner look in the lunch box and reduces the most reactive cut surfaces. Use a melon baller or the tip of a paring knife to scoop out any remaining core tissue from wedges.
03
Slice Just Before Packing
The less time between cutting and sealing in a lunch box, the better. If you are packing lunch in the morning, slice the apple last — after everything else is already in the bag. If you are prepping the night before (perfectly fine with a salt water soak or honey dip), dry the slices thoroughly before placing them in an airtight container. Excess moisture in the container makes the apple flesh soft by lunchtime.
04
Pat Dry Before Packing
Whether you used a liquid treatment or just rinsed the slices, always pat them dry with a clean paper towel or kitchen towel before placing them in the container. A layer of standing moisture speeds up oxidation and softens the texture. Dry slices also stack and nest more cleanly inside a compartmentalized lunch box.
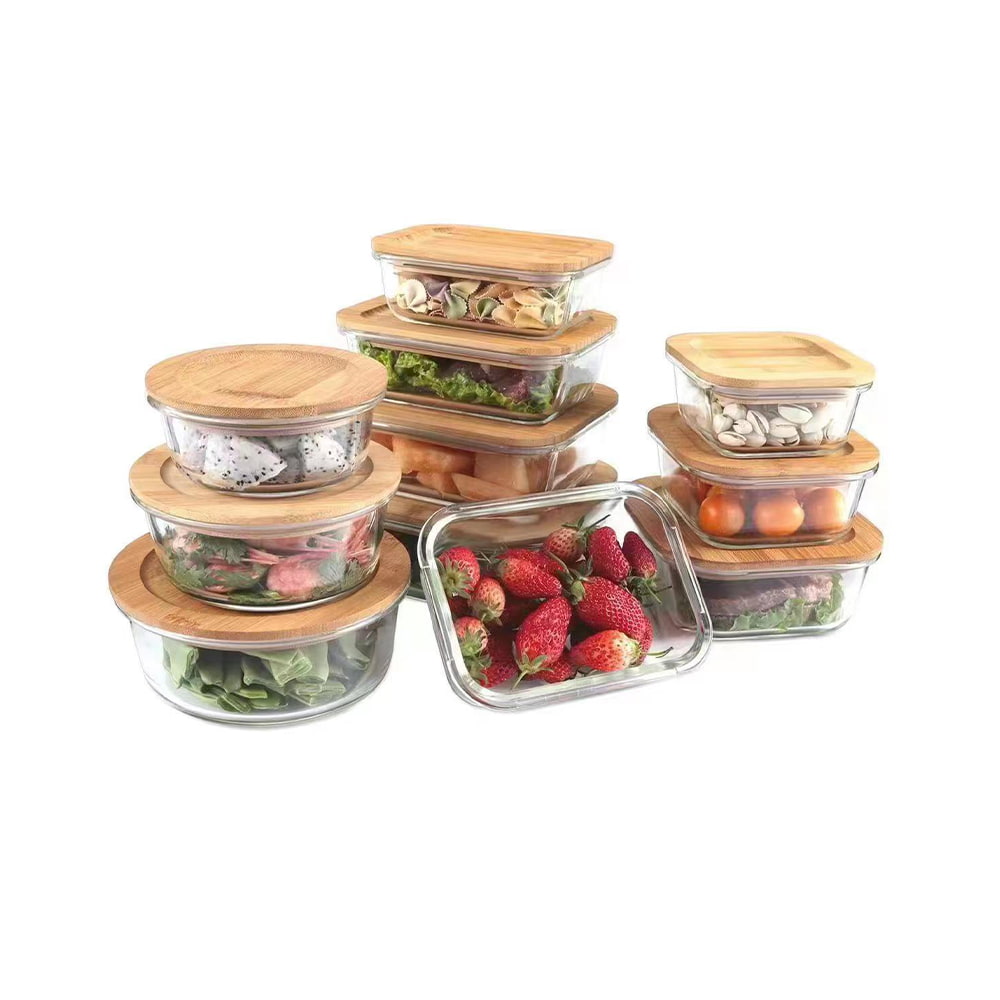
Choosing the Right Container and Lunch Box Setup
The container is the last line of defense against browning and sogginess. The goal is to minimize the air pocket above the slices, keep the slices cold, and prevent them from absorbing odors or leaking juice onto other lunch items.
Airtight Small Containers
A small airtight container with a snap or lock lid is ideal. Fill it as full as possible — a half-empty container traps more air, which means more oxygen reacting with the apple. If the container is too large for the portion, add a crumpled piece of damp paper towel to fill the space and help maintain humidity without waterlogging the slices.
Glass containers with silicone-sealed lids are excellent for odor prevention and easy cleaning. Plastic containers with locking lids (like those from OXO or Sistema) are lighter and better suited to children's lunch boxes where weight matters.
Compartmentalized Lunch Boxes
A lunch box with dedicated compartments — such as a bento-style box — lets you pack apple slices in one section while keeping dips, sandwiches, and other items separate. This prevents the apple juice from soaking bread and keeps each item at the right texture by lunchtime. Popular bento-style lunch boxes from brands like LunchBots, Bentgo, and Monbento have compartment sizes well-suited to a half-apple's worth of slices.
If your lunch box does not have built-in compartments, a small silicone cupcake liner or a reusable zip bag inside the main compartment works as a divider for the apple slices.
Temperature Control
Cold temperature is one of the most effective browning inhibitors available. Keep sliced apples below 40°F (4°C) until eaten. In a lunch box, this means including at least one ice pack. A frozen gel pack placed directly above the apple container (so cold air sinks onto it) maintains safe food temperatures for four to six hours according to USDA food safety guidelines. For very long school days or hot climates, use two ice packs.
Which Apple Varieties Hold Up Best After Slicing
Not all apples brown at the same rate. Variety makes a meaningful difference, and choosing a naturally slow-browning apple can reduce how much anti-browning treatment you need. The browning rate depends on the concentration of PPO and phenolic compounds in the flesh.
Slowest to Brown
- Cosmic Crisp — A relatively new variety (released commercially in 2019) bred partly for its extremely slow browning. In independent testing by Washington State University researchers, Cosmic Crisp slices showed minimal browning at 24 hours without any treatment.
- Opal — A non-GMO naturally slow-browning variety. Slices hold their color for several hours with no treatment, making them a favorite for lunchbox prep.
- Arctic varieties (Arctic Gala, Arctic Fuji, Arctic Golden) — Genetically engineered to suppress PPO. They do not brown for 15–18 days when sliced, according to Okanagan Specialty Fruits, the company that developed them.
Moderate Browning
- Honeycrisp — Browns in about 30–60 minutes without treatment but is so popular for its crunch and flavor that most people use a light lemon or salt rinse and it performs well.
- Fuji — Dense flesh slows both browning and moisture loss. With a quick treatment, Fuji slices stay appealing for six or more hours.
- Gala — Mild flavor and moderate browning rate. Good for younger children who prefer less tart apples.
Fastest to Brown
- McIntosh — Soft flesh and high PPO activity. Browns quickly and goes mushy; not recommended for lunch box slices.
- Empire — Similar texture to McIntosh; adequate with treatment but better eaten fresh.
- Cortland — Historically valued for low browning, but in practice the flesh is soft and does not hold up well to slicing for travel.

Prepping Sliced Apples the Night Before: A Step-by-Step Guide
Night-before prep is a major time-saver on busy school and work mornings. With the right technique, slices prepared 10–12 hours in advance are nearly indistinguishable from freshly cut ones when the lunch box is opened at noon.
- Prepare the soaking solution first. Mix one-quarter teaspoon of salt in two cups of cold water in a bowl, or mix one tablespoon of honey into one cup of cold water. Have it ready before you start slicing so the apple spends the minimum time exposed to air.
- Slice and core the apple quickly. Use a sharp knife or apple corer-slicer. Work efficiently — speed between cutting and submerging in the treatment matters more than anything.
- Soak for 3–5 minutes. Fully submerge the slices. Do not leave them soaking longer than 5 minutes — extended soaking can soften the texture and make the apple watery.
- Drain and pat completely dry. Lay the slices on a clean kitchen towel or paper towels and gently press out excess moisture. This step is non-negotiable. Wet slices in a closed container create condensation that accelerates softening overnight.
- Pack tightly into an airtight container. Fill the container to the top. Lay a small piece of plastic wrap directly on top of the slices before closing the lid to further reduce the air gap.
- Refrigerate overnight. Place the sealed container toward the back of the refrigerator, where it is coldest. Do not place it in the crisper drawer alongside ethylene-producing fruits like pears or bananas, which can accelerate ripening and softening even through a sealed container.
- Transfer to the lunch box in the morning. Move the container directly from the refrigerator into the lunch box with an ice pack. Avoid leaving it on the counter at room temperature while you finish packing.
Pairing Dips and Accompaniments in the Lunch Box
Apple slices become a more satisfying and nutritious lunch component when paired with a protein- or fat-rich dip. The combination adds staying power and makes the fruit feel like a complete snack rather than an afterthought. The key in a lunch box is to pack the dip separately to prevent the apple slices from sitting in liquid and getting soggy.
Peanut Butter or Almond Butter
The classic pairing. Pack two to three tablespoons in a small silicone dip cup or a dedicated sauce container. Natural nut butters can separate in warm conditions, so stir well the night before and refrigerate the portion cup alongside the apple slices.
Greek Yogurt Dip
Mix plain Greek yogurt with a teaspoon of honey and a pinch of cinnamon. The protein content is significant — about 10 grams per half-cup serving — and the tang complements sweet apple varieties like Fuji or Gala particularly well. Keep the dip cup in direct contact with the ice pack.
Cream Cheese
Plain or flavored cream cheese (cinnamon, honey walnut) spreads thickly and stays in place on a slice without dripping. A one-ounce portion packs well in a small container and does not require stirring. It works especially well with tart apple varieties like Granny Smith.
Cheese Cubes
Rather than a dip, pair apple slices with cubes of cheddar, gouda, or Colby cheese in the same compartment or an adjacent one. The apple-and-cheese pairing is nutritionally balanced and appealing to most ages. Use a sharp or aged cheddar for the best flavor contrast with sweet apples.
Sunflower Seed Butter
A nut-free alternative for school lunch boxes with allergen policies. Sunflower seed butter has a similar consistency to peanut butter and a slightly earthy flavor that pairs well with honey-treated apple slices. Check that the brand you use is produced in a nut-free facility if allergies are a concern.
Caramel Dip
For a treat-style lunch, a small portion of thick caramel dip in a leakproof container alongside apple slices transforms the lunch box into something a child will be excited to open. Use a store-bought caramel sauce in a resealable squeeze pack, or spoon a tablespoon of thick caramel into a snap-lid container. Keep it isolated from the apple slices to prevent soaking.
Packing Apple Slices for Kids: Specific Tips for School Lunch Boxes
Children's lunch boxes present a few unique challenges. Kids may not eat their apple slices right away, opening times vary by school schedule, and younger children often have strong preferences about texture and appearance. A brown or mushy apple slice is frequently the reason a piece of fruit comes home uneaten.
Use the Honey Dip for Kids
Children tend to prefer honey water treatment over lemon juice because it adds a subtle sweetness rather than tartness. The honey coating also gives the slices a slightly glossy appearance that looks more appetizing to young eaters. Use Cosmic Crisp or Fuji apples for the sweetest, crunchiest result.
Cut Slices Small Enough to Eat Without Biting
For children under six, cut wedges in half lengthwise to create thin strips rather than thick wedges. Thin strips are easier for small hands to hold and do not require a large bite that can be difficult for children with loose teeth. They also pack more compactly in a small lunch box compartment.
Keep the Skin On for Easier Handling
Apple skin provides grip and structural integrity to slices. Peeled slices are slippery, harder for kids to pick up, and slightly more prone to browning since the entire surface (including the formerly protected skin side) is now exposed flesh. Unless the child actively dislikes skin, keep it on.
Align Packing with the Lunch Schedule
If you know your child's school has lunch at 11:30am rather than 12:30pm, you have more flexibility with preparation time. A light treatment and a well-sealed container can hold slices perfectly for four hours; eight-hour protection requires either a more aggressive treatment (salt water soak plus refrigeration) or a naturally slow-browning variety.
Let Kids Help Pack Their Lunch Box
Research in pediatric nutrition consistently finds that children are more likely to eat foods they helped prepare. Having a child choose the apple variety, help press the apple slicer, or pick their dip of choice dramatically increases the odds the fruit gets eaten at school rather than traded or thrown away. Even a five-year-old can safely press an apple slicer with supervision.
Packing Apple Slices for Work: Adult Lunch Box Strategies
Adult lunch boxes often have access to a workplace refrigerator, which changes the calculus considerably. If you can store your lunch box in the office fridge upon arrival, browning is a minimal concern — the combination of the treatment, airtight container, and consistent refrigeration means your apple slices will be fine for a full workday.
When refrigeration is not available (working from a car, outdoor job, travel), plan for up to eight hours at ambient temperature with an ice pack and use the salt water soak method as your primary treatment.
Desk Job with Office Fridge Access
- Slice the morning of with a quick lemon juice toss
- Pack in any airtight container with your lunch box
- Refrigerate at work immediately on arrival
- Pair with almond butter or cheese for a complete snack
On-Site or Outdoor Work, No Fridge
- Salt water soak the night before, dry thoroughly
- Pack in an insulated lunch box with two ice packs
- Use a stainless steel insulated container for the apples (holds cold longer than plastic)
- Eat within 6–7 hours for best texture
Travel and Long Commutes
- Use Cosmic Crisp or Opal apples (naturally slow browning, no treatment needed)
- Reassemble method + rubber band if you want zero liquid involved
- Pack in a rigid container to protect against crushing in a bag
- A frozen water bottle serves as both ice pack and drinking water
Common Packing Mistakes That Ruin Apple Slices by Lunchtime
Even experienced lunch packers make avoidable errors with apple slices. These are the most frequent problems and how to fix them:
Mistake
Fix
Skipping the drying step after soaking — wet slices create condensation in the container, turning crisp slices soft within a couple of hours.
Always pat slices completely dry with paper towels before placing them in any container. Take the extra 60 seconds — it is worth it every time.
Using a container that is too large — excess air space means more oxygen for the browning reaction to work with.
Size the container to the portion, or add crumpled plastic wrap to fill the gap and press lightly on the slices before sealing.
Skipping the ice pack — room temperature dramatically accelerates both browning and bacterial growth.
Always include at least one ice pack in the lunch box whenever perishable items are packed, including apple slices.
Packing apple slices next to hot items — a warm thermos or hot sandwich compartment raises the temperature of adjacent containers.
Use a lunch box with separate insulated compartments, or place the apple container as far from heat sources as possible with an ice pack between them.
Choosing a fast-browning variety without a treatment — McIntosh slices are unappetizing brown within 20–30 minutes of cutting.
Match the apple variety to your method. If you frequently skip treatments, switch to Cosmic Crisp or Opal apples.
Soaking in lemon juice for too long — more than a few minutes causes the flesh to take on a noticeably tart flavor that many children reject.
Toss briefly (30 seconds of coating), drain immediately, and dry. You do not need a prolonged soak with lemon juice the way you do with a salt water method.
Nutritional Benefits of Including Apple Slices in a Lunch Box
Beyond the practical packing challenge, apple slices are one of the best foods to include in a lunch box on nutritional grounds. A medium apple (about 182 grams) provides:
- 4.4 grams of dietary fiber — about 16% of the daily value — including both soluble fiber (pectin, which supports gut health) and insoluble fiber (promotes healthy digestion). Source: USDA FoodData Central.
- 95 calories, naturally free of fat and sodium, making them a filling option that does not add excessive energy to a lunch.
- Vitamin C: approximately 8.4mg per medium apple, contributing to daily antioxidant intake. The vitamin C itself also provides mild enzymatic browning inhibition on the cut surface, which is part of why lemon juice works as a treatment.
- Quercetin, catechin, and chlorogenic acid — polyphenol antioxidants concentrated in the skin. A 2020 review in Nutrients journal noted associations between apple consumption and reduced risk of chronic disease markers, partly attributed to these compounds.
- Water content: approximately 86% — sliced apples contribute meaningfully to hydration, which is often overlooked in packed lunches.
For children especially, a daily lunch box apple slice portion delivers consistent fiber intake that supports healthy digestion and helps manage afternoon blood sugar levels — avoiding the post-lunch energy crash common with refined-carb-heavy school lunches.
Frequently Asked Questions About Packing Sliced Apples for Lunch
How long do sliced apples last in a lunch box?
With an anti-browning treatment (salt water soak or honey water) and an ice pack, sliced apples remain crisp and appetizing for six to eight hours in a lunch box. Without a treatment but with refrigeration, expect good quality for four to five hours. At room temperature with no treatment, browning begins within 15–20 minutes depending on the variety.
Is it safe to pack apple slices in a lunch box overnight?
Yes — prepping slices the night before is a common and safe practice if you follow proper steps. Soak the slices in a salt water or honey water solution, dry them thoroughly, pack in an airtight container, and refrigerate. When placed in the lunch box with an ice pack the next morning, they will be safe to eat at lunch according to standard food safety temperature guidelines (keeping food below 40°F / 4°C).
What is the best anti-browning method for a kid's lunch box?
The honey water dip is most popular for children's lunch boxes. It adds mild sweetness rather than tartness (unlike lemon juice), is very easy to prepare, and provides six to eight hours of protection. Mix one tablespoon of honey with one cup of water, soak for 30 seconds, drain, and dry before packing.
Can you pack apple slices with other fruits in the lunch box?
Yes, but choose companions carefully. Citrus segments, grapes, and blueberries pack well alongside apple slices. Avoid placing sliced apples next to high-ethylene fruits like bananas, pears, or plums in the same compartment — ethylene gas accelerates ripening and softening, even through thin container walls. If the lunch box has separate compartments, this is less of a concern.
Does peeling the apple affect how long it stays fresh in a lunch box?
Peeled apples brown faster than unpeeled apples because the skin acts as a natural protective barrier against oxygen. If you peel slices for a young child, use a more robust treatment (salt water soak) and ensure the container is packed as airtight as possible. For older children and adults, leaving the skin on is strongly recommended for both freshness and nutritional value.
What container is best for apple slices in a lunch box?
A small, rigid airtight container is best. Look for one that fits the slices snugly with minimal air space. Silicone-sealed glass containers are excellent for odor prevention and durability. For children's lunch boxes, lightweight plastic containers with locking lids (such as those from Sistema or OXO Tot) are practical. Avoid zip bags — they allow too much air contact and slices can get crushed.
How much lemon juice should I use for apple slices?
Use about one teaspoon of lemon juice per medium apple. Toss the slices in the juice to coat all cut surfaces, then immediately dry them before packing. You do not need to soak them the way you would with salt water. More lemon juice does not improve protection proportionally — it mainly adds more tartness that many people (especially children) find off-putting.
Can I use apple cider vinegar instead of lemon juice?
Yes. Apple cider vinegar works as an anti-browning treatment because of its acidity. Use a very dilute solution — about one teaspoon of apple cider vinegar mixed with one cup of water — and soak for two to three minutes. The flavor impact is more pronounced than with lemon juice for most people, so rinse briefly after soaking if you use this method for a child's lunch box.
Are Cosmic Crisp apples really worth the extra cost for lunch box packing?
If your household regularly packs apple slices for lunch boxes and you find yourself spending time on anti-browning treatments, Cosmic Crisp apples can be genuinely worth the premium price. Their natural resistance to browning means you can skip the treatment entirely for lunches up to four to five hours away, saving prep time. They also have an exceptionally crunchy, dense texture that holds up well during transit in a lunch box.
How do I stop apple slices from getting soggy in the lunch box?
Sogginess comes from two sources: excess moisture from the treatment, and condensation inside a sealed container. To prevent it: dry the slices completely after any liquid treatment, use a container sized to the portion (less air = less condensation), and keep the slices cold with an ice pack (cold air holds less moisture than warm air). A small piece of paper towel placed inside the container can absorb any residual condensation.
Productos recomendados

")


¿Quieres algunas noticias?
Ponerse en contacto

Estoy abierto a la cooperación y la asociación, escríbeme.
- PRODUCTO
- Tarro de cristal para conservar alimentos
- Vasos y tazas de vidrio/acero inoxidable
- Contenedores de condimentos de cocina
- Decoración del hogar
- Enlaces rápidos
- Productos
- Sobre nosotros
- Fabricar
- ODM/OEM
- Noticias
- Contáctenos
- Contáctenos
-
-
 7 Crystal Boulevard, Pueblo de Feng de Xi’an, Condado de Baoying, Provincia de Jiangsu, China.
 -
 WhatsApp: +86-18083783456
 -
 +86-18083766162
+86-18083783456
+86-15895746638
+86-0514-8866-8898
-
 julia@nchousewares.com
Jack@nchousewares.com
-
- CONTACTO
Derecho de Autor © Yangzhou New Coordinate Household Articles Co., Ltd.

